Saturday, February 18, 2012

Panna Cotta

I dont make dessert often enough.  With the last of the fresh summer berries available now, I vow to make panna cotta more often!

IMG_5199


Recipes vary widely - some use cream only, or add varying portions of milk for a lighter finish.  I've seen yoghurt used in place of some or all of the cream, too.  I recommend you find the mix that is right for you (I've settled at about one third milk).
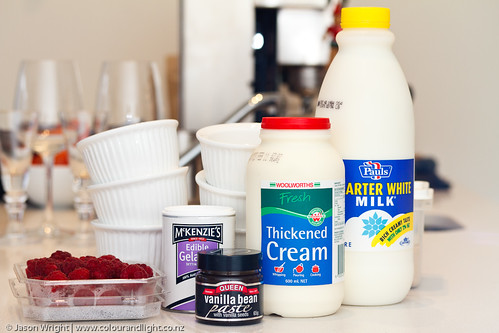

IMG_5134


To make six serves, you will need one litre of liquid (cream/milk/yoghurt) to 3 tsp of gelatine powder (follow the packet instructions to reconstitute), plus a teaspoon of vanilla extract (or a whole vanilla pod, scraped) and 110g of fine sugar (again, you can play around with this - I've substituted brown sugar for a "caramel" panna cotta in the past).
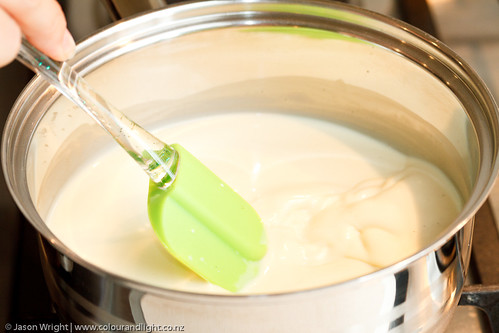

Panna cotta


Add the cream, milk, sugar, and vanilla to a saucepan, and stir on medium heat until just boiling.
Add gelatine, stirring until dissolved.
Pour into moulds, and refrigerate until set (about 4 hours).  
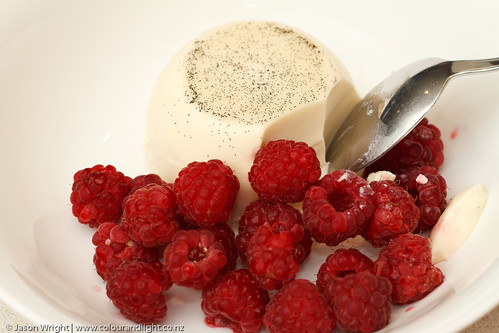
Run a sharp knife around the edge if required to get the mould to separate (or just eat straight from the pot!)  Serve with fresh fruit.
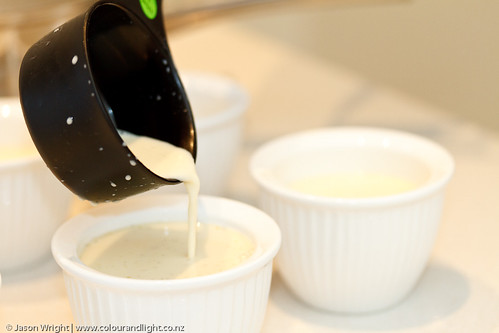

Panna cotta


I also recommend finishing with a campari jelly, as in this Donna Hay recipe - yum!
 

Sunday, February 5, 2012

Why you should be cooking duck at home

Jason came home from a work dinner recently, at a restaurant which he described unremarkable.  While reading the menu, and trying to choose the lesser of the evils on offer, a colleague tried to help: "I try to choose something I couldn't get at home - so I'm having the duck".  Jason's response?  "Oh - my wife cooked that a couple of nights ago."

Do not be scared of duck!  It's damned easy, and it is delicious!

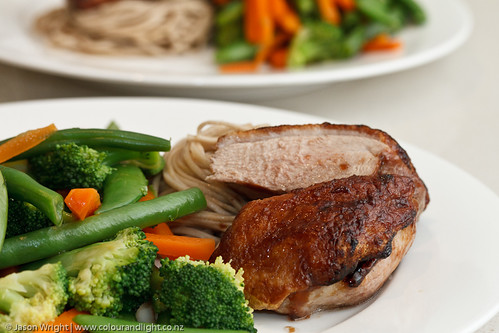
IMG_0841


The main challenge I hade before moving to Melbourne was getting my hands on it.  After years of begging anyone I knew with a gun to get me one - and offering to pluck it myself if required - I finally came across a reliable source of wild duck (thanks, Pinky!)  These days most markets and supermarkets offer whole cleaned duck (you just roast it, like a chicken.  I'll show you soon) - or breast fillets. 

To pan-fry duck breast fillets, you need to know three things:
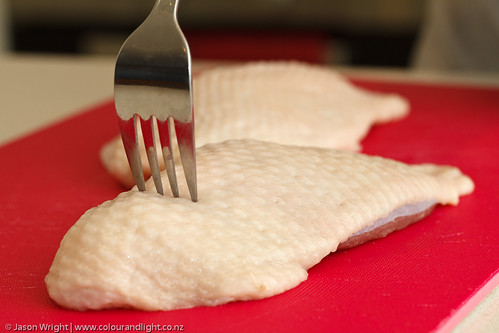
1. prick the skin all over first
2. most of the cooking time, the skin side should be facing the heat
3. save the fat!


There, now you know.


Prick the skin deeply enough to puncture the fat.  This helps it to drain out during cooking and leaves you with a beautiful, crispy skin.


IMG_0817

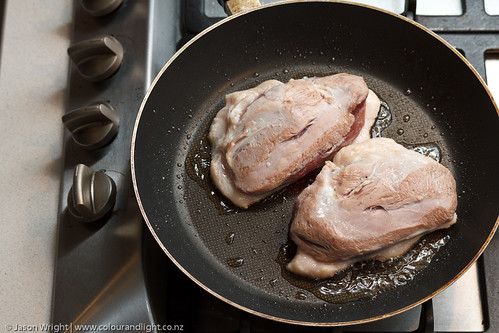
In a hot frypan (turn to highest setting, and allow to preheat), quickly sear the meat side, then turn over so the skin meets the pan.

IMG_0826

In the first couple of minutes, the shape of the breast will change - it gets shorter and fatter.  This is normal.

IMG_0832

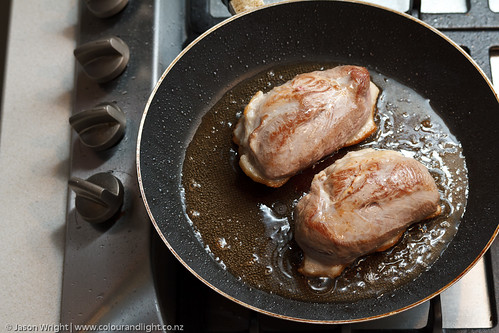
See the golden fat draining off?  You want to save it in a heat-proof container (I use a pyrex glass jug, or a coffee cup) - pour it out of the pan very carefully (it will burn you badly if you touch it), and let it cool to room temperature.  Once cool, transfer to an ice cube tray, freeze, and use later to make amazing roast potatoes.  I'm going to have to show you that, too - soon.

IMG_0829

I turn occasionally, but make sure that about 80% of the total cooking time is skin-side down.  Total cooking time is 5-10 minutes, I usually just wait until the skin feels right (it should be crispy, not chewy).  Duck should be served medium (pink in the middle, but not "raw").  Glaze with oyster sauce if desired.


NOTE: If your duck breasts are skinned, this is probably healthier but you will miss out on the skin and the roast potato opportunity.  Just pan-fry on a high setting, for about 2 mins each side.  Expect skinless breasts to be a little on the dry side (they don't have that beautiful fat basting them while cooking!) and serve with a jus or sauce.

Saturday, February 4, 2012

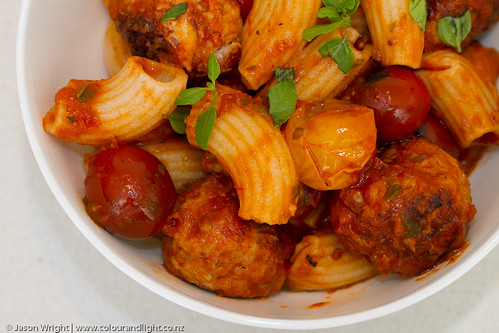
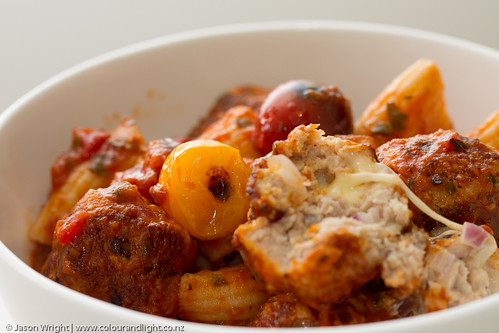
Rigatoni with Surprise Meatballs

IMG_2376

This one is a quick and easy weeknight dinner.

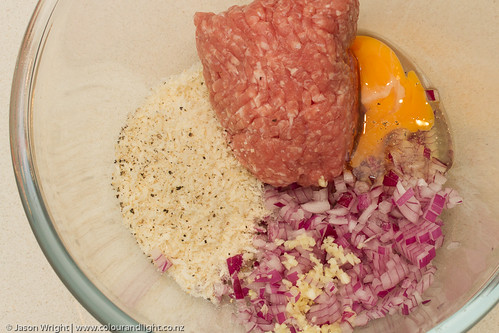
IMG_2364

My meatball recipe varies every time I make it, depending on what is in the fridge.  There is typically more vegetable in each ball than meat (a long-standing joke in our household) - almost always a finely diced onion, and usually a grated carrot and/or zucchini too.  Various flavourings (garlic, spices, tomato paste) and often porridge instead of breadcrumbs (I'll share that one with you - trust me, it's great!).  Today though,l I'm keeping it simple:
250g pork mince, a small diced onion, a clove of garlic (chopped), a couple of handfuls of breadcrumbs, an egg, and salt & pepper.
And then, the surprise...

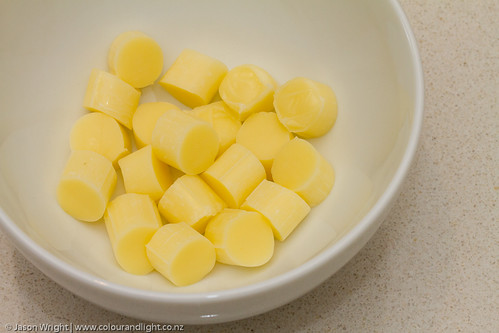
IMG_2365

I've "diced" mozzarella sticks (Bega "Stringers", designed for the school lunchbox crowd), and will sneak a piece into the middle of each meatball.

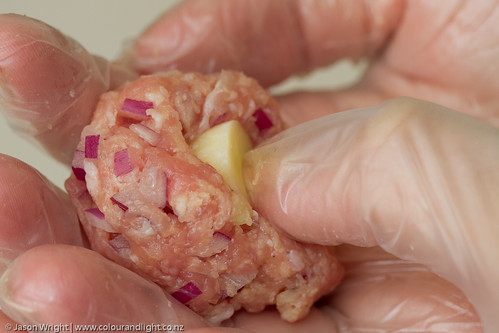
IMG_2370

Form the meatball, then simply press the mozzarella into the centre, and pinch closed.  Make sure you can't see the cheese - it should be completely enclosed to prevent "leakage" during cooking.

I've made small meatballs here, too cook in the frypan.  I make bigger ones when baking.


A couple of minutes on medium heat in the frypan, then simmer for 10 minutes in the sauce of your choice (it's a weeknight, so this is Leggos stir-through, straight from the jar, with some cherry tomatoes for a bit of kick.)

IMG_2373

Yum.

Saturday, January 28, 2012

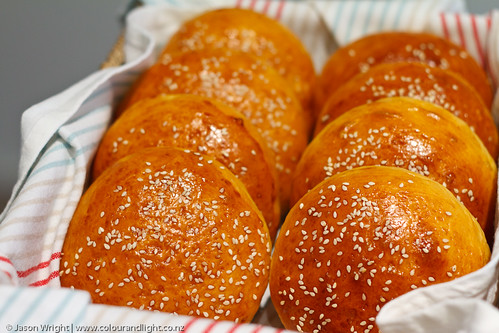
Bread 102: Hamburgers

I made these hamburger buns to share with friends at an Australia Day BBQ (a beautiful afternoon with a vege garden, grass to lie on, clouds to watch, and sunshine.)  We filled them with salad and homegrown tomatoes, and homemade patties.  And beetroot.  It might have been Australia Day, but we are still kiwis!!!

IMG_1732

Basically, the same rules apply.  A ratio of 5:3 (flour:water) but with a few tricks to make the buns soft and moist:  add butter and sugar, and switch water for low-fat milk.  To make 8 buns, that meant:
600g flour
360g milk
113g butter (melted)
75g sugar*


I melted the butter and warmed the milk - this helped the yeast to kick in quickly, and I couldn't help thinking how nice it would be to knead warm dough in winter!  Must remember this trick.
Finish with an egg wash - and, of course, sesame seeds!


*a word of warning - the American recipes I based this on used (typically) three times this quantity of sugar!  If your tastebuds are based on any other continent, you will want to cut the sugar right back when using American bread recipes.  But don't skip it completely, it acts as a humectant which means it helps the bread retain water and contributes to the softness of these rolls.

Wednesday, January 18, 2012

Bread 101

IMG_1725

Have you ever made your own bread?  It's one of those challenges you step up to, and then find it's so easy you can't believe it's taken you so long. 

First, a disclaimer: this is not the same as store-bought bread.  You need to eat it within a day or two, or it will be stale.  The good news is that this is not store bought bread.  It is doughy, and yeasty, and tastes like real bread.  You can eat it fresh, or toast it, or make hamburgers with it, and you can add nothing at all, or whatever you like - because you are in charge.

All you need to know is the basic ratio of 5:3.  That's 5 parts flour to 3 parts water.  Just add yeast and salt, and a little elbow grease. 
Using ratios means you need to weigh your ingredients.  With a scale.  I am going to preach endlessly about the virtue of scales this year, like any newly-converted devotee.  If you want the full story, you can buy the book, but basically I learned this year that a cup of flour can vary from 110 to 160g depending on how much air is in it and what kind of cup you are using (the US standard "cup" is 240mL, Australia/NZ use 250mL.  Some older measures are different again.)  A scientist at heart, I can no longer trust recipes, especially when baking, if they are measured in cups - what kind of cup?  Weights are so precise!
A ratio also gives you the basic formula, in a way that allows you to make changes once you understand the role each ingredient plays.  Here, I've switched a third of the flour for wholemeal, and added a little milk instead of water to see what happened (not much, though in theory it should soften the bread a little).

My yeast calls for 3 cups of flour per sachet (I use active yeast, no preparation required), so I used this as the base of my ratio.  3 cups = 3 x 150g = 450g. Flour is the "5" in the ratio, so I divided 450 by 5, then multiplied by 3 to get the water ratio = 270g.  

IMG_1707
450g flour, 270g water, 1 sachet active yeast, and 1-2 tsp salt.

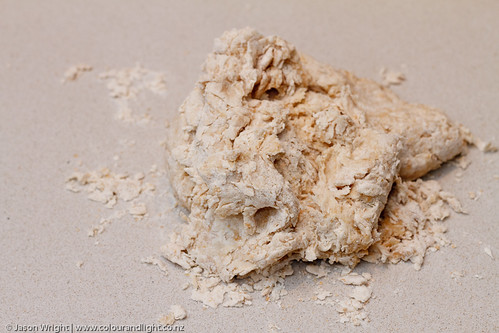
Give it a bit of a stir in the bowl to bring it together, then turn it onto a flat, clean surface.

IMG_1709

Knead it until smooth, and then keep going for a few more minutes (if your arms don't hurt, you are doing it wrong.  Or you're more fit than I am!) 

IMG_1710

Form a ball, and place it in a clean bowl lightly greased with olive oil.  Cover with a damp teatowel and leave in a warm spot (like the floor of your bedroom if the aircon happens to be on in the lounge) until it doubles in size - usually a couple of hours, but this depends on the temperature, and the age of your yeast.

IMG_1713
IMG_1715

Punch the air out of the ball, and knead again for a minute.  This is a good time to add any "extras" you want to throw in.  I couldn't make my mind up, so added olives, semi-dried tomatoes, pecans, and sunflower seeds - about half a cup in total, chopped.

IMG_1717

Form rolls.  I find that about 130g per roll yields a sandwich-sized roll (probably need half again or even double for a burger bun).  Bear in mind that these are more dense than supermarket rolls, so quite filling!
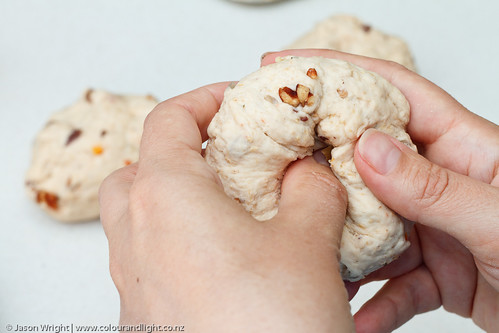
A trick I learned working in a bakery in my youth is to form the roll by folding the dough in to the centre, turning it as you go.  This pushes the dough in the direction you want it to rise, promoting even rising.  Like so:

IMG_1719
IMG_1720

Place on a greased tray, brush with water, and leave to double in size again (about an hour).

IMG_1723

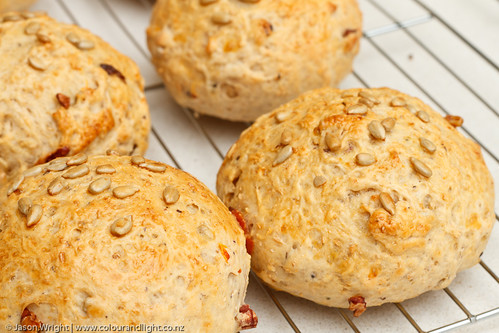
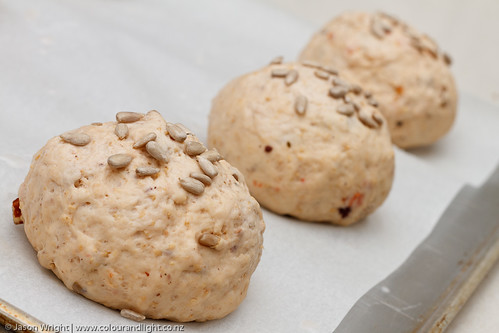
Brush with milk, or egg wash, sprinkle with extra seeds if you like, then bake at 200C for 12-15 minutes (bread is ready if you turn it upside down and knock on it, and it sounds hollow.)

IMG_1725

Best enjoyed hot, with lots of butter!
 

Monday, January 16, 2012

2012: Things I love

DSCF1498

I love cherries.  Just had to share that.  I'm eating as many of these as I can get my hands on - so far, best heated in the Marlborough sun (that's where good Sauvignon Blanc comes from, folks.  It was a good week.)
If you don't have sunshine, keep 'em on the bench (keep the majority of your supply in the fridge if it's hot, but keep a day's worth on the bench).  Berries, tomatoes, and stonefruit must be eaten warm.

Hope that 2012 finds you well, and hungry - I'll be serving up a few favourites over the coming months.  Please bear with me as I have a hell of a year coming up work-wise... and thanks for sticking with me through the past year and a half - I know I've been a bit erratic.

Saturday, August 27, 2011

Requests: Lamb Casserole

This one was much easier!  (And hubby says "please thank the internets for the YUM" - he was pretty spoilt this week)

Alphamatrix requested a tomato-based lamb casserole, without herbs.  This is my favourite kind, so I can definitely relate!
Rogan Josh comes immediately to mind - this is one of my favourite ways to casserole lamb, and tomato is key.  The best recipes (or mixes) have you adding tomato very late in the game, so you can still taste the fresh tomato-ness through the spices.

The other thing that comes to mind is honey.  Usually with mint, but I know that's a herb so will put it with tomato instead!

IMG_9579

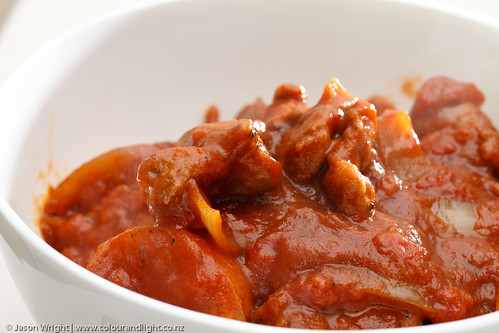
This is quick, too, if you have tender cuts of meat.  I whipped this up in half an hour, on a weeknight.. or you could pop it in the slow-cooker if you had time (and could use a tougher cut of meat).


Slice and brown an onion in a little oil, then stir through a couple of teaspoons of rich, spicy honey (I used stringy bark, but in NZ would use Manuka or Rewarewa).  Let it caramelise, then remove from heat and set aside in a bowl.
Dice potato and carrot, and boil in a small saucepan until starting to soften.  Drain and set aside with the onion.
Coat lamb pieces (I used a good quality casserole dice from the butcher, 300g for two of us) in a couple of tablespoons of flour, mixed with a teaspoon of smoked paprika, and a dash of chilli powder.  Brown in a couple of tablespoons of oil (preferably in the caramel left in the bottom of the frypan from the onions).
Add a 300g tin of chopped tomatoes, and a tablespoon of tomato paste.  Simmer.
Add the vegetables, and another tablespoon of honey.


Serve as soon as the sauce is thick.  This would be great with mashed potato - but I was in a hurry and just added potato directly to the casserole, and served with steamed broccoli!